Find a Tutorial
 Autograph
 Color Genius
 DEFlicker
 RE:Fill
 RE:Grade
 RE:Lens
 REZup
REZup


-
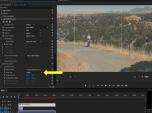
Quick Tip - Setting Color Correction Window
See TutorialDescription
Description:This tutorial covers the best practices and tips for using DE:Flicker in Premiere Pro to get the best results. This complements our other tutorials about specific features of the product that work the same in all applicationsThis tutorial covers the best practices and tips for using DE:Flicker in Premiere Pro to get the best results. This complements our other tutorials about specific features of the product that work the same in all applications.Description:In this tutorial, you learn about the Window option for more precise color matching with RE:Match color. This complements our other tutorials about specific features of the product that work the same in all applications.
This tutorial covers the best practices and tips for using DE:Flicker in Premiere Pro to get the best results. This complements our other tutorials about specific features of the product that work the same in all applicationsIn this tutorial, you learn about the Window option for more precise color matching with RE:Match color. This complements our other tutorials about specific features of the product that work the same in all applications.This Tutorial Includes
- Video
-
Lightwave to AE: Deformers and RE:Map
See TutorialDescription
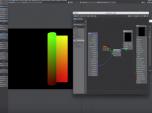
How to get a UV pass out of LightWave 3D, for use in After Effects using the RE:Map plugin with a few other tips along the way.
Check Mark Warner blog for other cool Lightwave tricks...
This Tutorial Includes
- Video
-
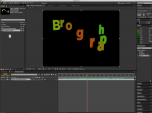
Brograph Tutorial 034 - C4D and RSMB Pro Vectors
See TutorialDescription
Thank you to "Brograph Tutorials".
In this tutorial, you will learn how to render out motion vector files in C4D and bring them into AE and use the RSMB plug in for motion blur.
*Note: The author forgot to set his project to 16 bpc of floating point which removes a lot the need the smooth the motion vector pass (why he uses a blur) particularly as resolution increases.
If you work in floating point in AE, you could also use shift channel instead of set matte.
You can also do all the MV pre-processing with RE:Fill Alpha or RE:Fill choke if you have that.This Tutorial Includes
- Video
-
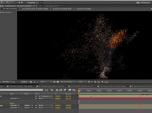
Twixtor, Particular and RE:Fill create a unique motion-based particle effect
See TutorialDescription
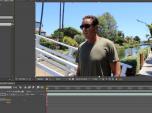
This tutorial will show how to use Twixtor Pro and RE:Fill and Trapcode’s Particular to turn a real-world person (or any object) into what looks like the person is made out of particles. We will be using the motion calculated from the object to throw the particles off the person, which provides more interaction between the person and the particles. You will need Twixtor Pro and RE:Fill by RE:Vision Effects and Particular (by Trapecode for Red Giant) for this tutorial.This tutorial will show how to use Twixtor Pro and RE:Fill and Trapcode’s Particular to turn a real-world person (or any object) into what looks like the person is made out of particles. We will be using the motion calculated from the object to throw the particles off the person, which provides more interaction between the person and the particles. You will need Twixtor Pro and RE:Fill by RE:Vision Effects and Particular (by Trapecode for Red Giant) for this tutorial.
This Tutorial Includes
- Video
-
Using Twixtor and After Effects to retime both audio and video
See TutorialDescription
Many users ask us if Twixtor can retime audio. While Twixtor only retimes video, there is an easy way to use After Effects to retime the audio, but use Twixtor to retime the video, all at the same time. This tutorial shows you two different methods on how to do this.
Special thanks to Tim Easton for being my model for the footage.
This Tutorial Includes
- Video
-
Using RE:Flex Warp with Mocha’s tracking of open splines
See TutorialDescription
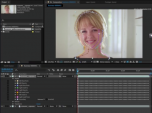
In this tutorial, Mary Poplin shows how to use Mocha to speed the process tracking of important features of a model’s face. The tracked splines are then used with RE:Flex Warp to make the model a bit thinner. A similar technique could be employed that used Mocha to track two sequences and import the open splines for use with RE:Flex Motion Morph for tracking assistance when producing a morph on two moving sequences.
This Tutorial Includes
- Video
-
“Save our Beaches” – an example using multiple RE:Vision Effects plugins
See TutorialDescription
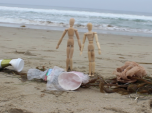
This video is a showcase of a short PSA created using RE:Match, DE:FLicker, ReelSmart Motion Blur and Twixtor that show real world example of problems solved such as: multiple shots that are automatically color matched, flicker removal, footage extended to match a needed duration, and motion blur added to remove stutter.A Special Thanks to:Mathias Omotola from http://www.maxon.net for helping me with the C4D title.Oton Bacar http://vimeo.com/user4329703 for the Twixtor Slomo bike footagePatrick Boivin https://www.youtube.com/user/PatrickBoivin for the Transformer, stop motion footageGrayson Hild http://www.graysonhild.com for the time-lapse pier and lifeguard tower time-lapse footage.Author: Lori FreitagCompany: RE:Vision Effectslink: http://revisionfx.com/products/This video is a showcase of a short PSA created using RE:Match, DEFlicker, ReelSmart Motion Blur and Twixtor that show real world example of problems solved such as: multiple shots that are automatically color matched, flicker removal, footage extended to match a needed duration, and motion blur added to remove stutter.
A Special Thanks to:
Mathias Omotola from http://www.maxon.net for helping me with the C4D title.
Oton Bacar http://vimeo.com/user4329703 for the Twixtor Slomo bike footage
Patrick Boivin https://www.youtube.com/user/PatrickBoivin for the Transformer, stop motion footage
Grayson Hild http://www.graysonhild.com for the time-lapse pier and lifeguard tower time-lapse footage.This Tutorial Includes
- Video
-
DEFlicker Exploring Features 2
See TutorialDescription
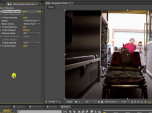
In this tutorial, we see more examples of DE:Flicker used for special case scenarios including flicker due to electricity, Rolling shutter, stop-motion and also how to use DE:Flicker to merge dual iso exposures shot with a Canon camera that was updated with Magic lantern firmware.Special Thanks to: Dan Lantz,Temple University for providing the Lobby footage used in example 1, Jack Tunnicliffe (Java Post Production www.javapost.ca) for the Ambulance footage used in Example 2, Stephen Hall for providing the Magic Lantern footage used in example 3 http://stevehallvideo.comand to Wes Plate and Carol Hodge , alarmingpictures.com for the stop motion footage used in Example 4.In this tutorial, we see more examples of DEFlicker used for special case scenarios including flicker due to electricity, Rolling shutter, stop-motion and also how to use DEFlicker to merge dual iso exposures shot with a Canon camera that was updated with Magic lantern firmware.
Special Thanks to: Dan Lantz,Temple University for providing the Lobby footage used in example 1, Jack Tunnicliffe (Java Post Production www.javapost.ca) for the Ambulance footage used in Example 2, Stephen Hall for providing the Magic Lantern footage used in example 3 http://stevehallvideo.com and to Wes Plate and Carol Hodge , alarmingpictures.com for the stop motion footage used in Example 4.This Tutorial Includes
- Video
-
DEFlicker Intro to Auto Levels
See TutorialDescription
In this tutorial, we see how to use DEFlicker to prep your footage and how to handle missing or bad frames. We also see how to use the mark segments option when you have to DE:Flicker an edit with multiple shots.
Special Thanks to: support@artbeats.com for providing the construction site time-lapse footage used in this tutorial.
Special Thanks to: Mike Hughes, for providing the Eclipse Time-Lapse footage.
This Tutorial Includes
- Video
-
DEFlicker Exploring Features
See TutorialDescription
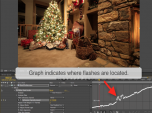
In this tutorial, we explore some of the advanced features of DE:Flicker and show examples of special case scenarios and how to use these advanced features to get better results.Special Thanks to: VideoBlocks.com for providing the hotel time-lapse footage and Christmas tree footage used in this tutorial.Special Thanks to: Dan Lantz,Temple University for providing the Lobby footage and to Anthony Magliocco for the Soccer footage.In this tutorial, we explore some of the advanced features of DEFlicker and show examples of special case scenarios and how to use these advanced features to get better results.
Special Thanks to: VideoBlocks.com for providing the hotel time-lapse footage and Christmas tree footage used in this tutorial.
Special Thanks to: Dan Lantz,Temple University for providing the Lobby footage and to Anthony Magliocco for the Soccer footage.This Tutorial Includes
- Video